Kit-Kat Kake
October 6, 2010
I haven’t been updating as regularly as I should. That is going to change! I tried to take pictures of this cake during the making, but I wasn’t having much luck with the camera working. All the photos came out fuzzy and blurry. Soooooooooo…here it is. The final product. The quickest cake ever made by me.![100500_2017[00]](https://harinayfe.files.wordpress.com/2010/10/100500_201700.jpg?w=300&h=225)
It’s a two layer-two tier kit-kat cake. M&Ms are dumped into the area left open. It just looks like a big bowl of candy! After you bake the cake and it is cooled, ice the cake and then immediately put the kit-kat bars against it. After they are put on, you can fill in the area with M&Ms. I tied a ribbon around to it help keep it all together.
I hope everyone at BCM really enjoyed this cake and that I can make it again one day
It’s been awhile! Choo Choo!
June 24, 2010
I know I know. Its those lazy summer days. Having a full time job doesn’t really give much time for baking and cooking and decorating and…it just leaves me tired a lot of times.
An old childhood friend’s mom is a great seamstress. Back in May I was in a wedding and Linda, Jessie’s mom, helped with a dress that was too big. She was so kind to do the dress for me and did such an amazing job. To pay her back I made Jessie’s son Jeffery a cake for his birthday this month.
Deciding what you want to do for a young child is always fun. I saw a model of a train topper on www.cakejournal.com and wanted to make it and I really hoped trains would be okay. Sure enough, a train cake was made!
![061900_0150[00]](https://harinayfe.files.wordpress.com/2010/06/061900_015000.jpg?w=300&h=225)
Now, I don’t have any other photos and this one itself is from my phone. I hope you can see the bigger part of the cake, but this is the backside since the fondant doesnt look so clean. =| I realized what I could’ve done different now to fix that. The top layer is a white cake and the bottom layer is all chocolate. The entire cake has buttercream frosting.
Jay helped tremendously on this cake. I was rather sick while making it and having his help made the night go much smoother, even though he had pink hands for a few days.
Missions Week at BCM
April 21, 2010
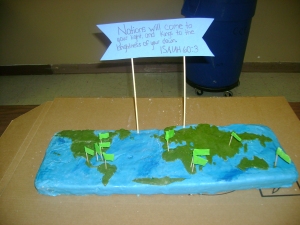
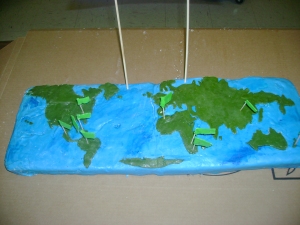
Well, this one took me awhile. This week at BCM was missions week, so I was asked to make a cake. It’s actually fitting for Earth day being right around the corner too, but its purpose is for missions. I was so happy to do a cake this big. I can’t wait to do another one!
The verse on the sign is from Isaiah 60:3- Nations will come to your light,
and kings to the brightness of your dawn
All of the flags are places where students are going this summer for missions.
A Valentine’s Day Sweet Treat
February 15, 2010
Molten Lava Cake
Sweets for your valentine! Melt in your mouth molten lava cake! This dessert is so small is and great for after a dinner, served with a variety of garnishes.
Yields: 6 ramekins; 12 muffin tins sized cakes
Ingredients
8 0z bittersweet or semisweet chocolate (1 cup)
10 tablespoons butter
1 1/2 cup powdered sugar
1/2 cup flour
3 eggs
3 egg whites
1 tbs vanilla
** Add any flavoring, such as coffee or peppermint.
Preheat oven to 425
Grease either 6 6 oz. ramekins or 12 muffin tins. I used butter to grease mine. I did half and half to see which I’d like best. I grabbed some additional butter and rubbed it all over the tins. I don’t have ramekins, although I want them so much! Think of all the options! French onion soup! Oh yum!
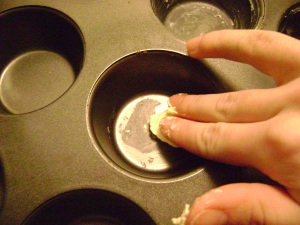
*Ignore my fat ring finger. Its still swollen from spraining it last week.
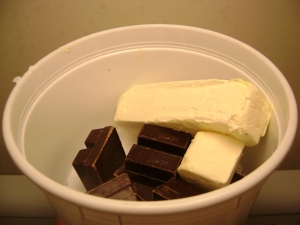
Add all 10 tbs of butter and 8 oz. of chocolate to a medium sized, microwave safe bowl. Heat for 1 minute and stir. Then heat for 30 second intervals, stirring in between each until smooth.
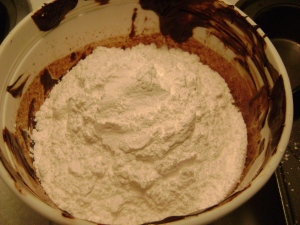
Add flour and powdered sugar to chocolate and butter. Stir until it looks like a typical cake batter. A huge mound of it.
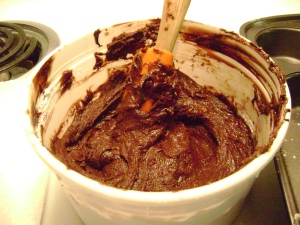
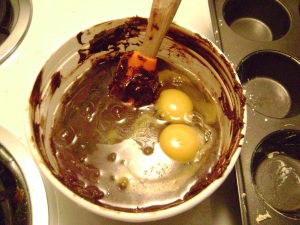
Add eggs and egg whites and stir with a fork until combined completely and add flavoring, such as vanilla.
Divide batter evenly among cups. They’re pretty full.
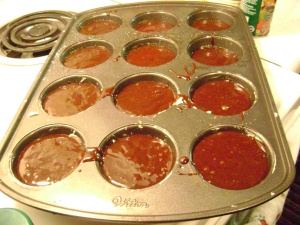
Bake for 10 minutes. Actually I’d bake for 8 minutes. Mine were a little too unmelty, unlava-like on the inside. Maybe its cause I left them in there for 1 minute longer since I was washing all my dishes.

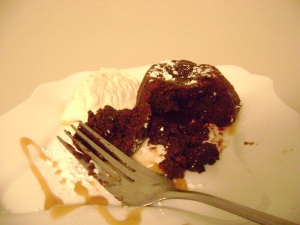
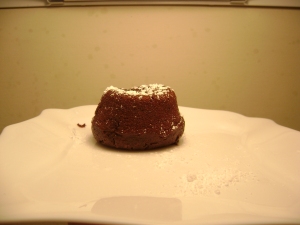
Take out and serve immediately. If you have ramekins, its easier, just invert onto plate and serve. With muffin tins, I ran a knife around them, making sure they weren’t stuck and then took a knife and stuck it under the cake gently and flipped into a plate, upside down.
Then I decorate.
And then we ate. and enjoyed. MMMMM
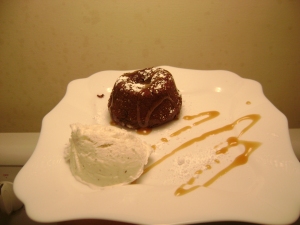
You can serve with anything you’d like; caramel, berries, cool whip, butterscotch, cherries…Whatever you like with warm chocolate cake. I served mine with powdered sugar, vanilla bean ice cream and caramel syrup.
In my opinion, the best so far!
December 26, 2009
First of all… sorry for the delayed post! I came home for Christmas break, and my computer’s charger has been shot. No worries now, its up and running!
Let me show you just a glimpse of what my Christmas gifts look like
This is just a portion of the baking stuff I received too!!! Maybe I should have shown you the depth of the bucket too…
Christmas is so full of baking! I made a couple of things, but I especially wanted to blog this one.
Look at this! It’s a cappuccino fudge cheesecake!I found it awhile back on Smitten Kitchen and immediately bookmarked it. I changed a couple of things from what she did, so my list below will be what I did, not SK. Mostly what I changed are things I did not have.
Oo-La-La. This is probably my prettiest cake to date. I love it. its very rich and filling. With al the calorie intake, it serves 32 people! That is insane!
Cappuccino fudge cheesecake
Crust
1/ box of oreo cookie, or 9 oz of any chocolate sandwhich cookies.
6 ounces bittersweet or semisweet chocolate, coarsely chopped
1/2 cup dark brown sugar, packed
1/8 teaspoon ground nutmeg
7 tablespoons hot melted unsalted butter
Ganache
1 1/2 cups heavy or whipping cream
20 ounces bittersweet or semisweet chocolate, chopped
Nearly 1/4 cup of cold coffee, then finish it off with a little bit of rum to the top. Dark or Light rum is fine.
Filling
3 8 ounce packages cream cheese, room temperature
1 cup sugar
1 1/2 tablespoons all purpose flour
1 1/2 tablespoons rum, dark or light
1 1/2 tablespoons instant coffee
2 teaspoons vanilla extract
1 1/2 teaspoons mild-flavored (light) molasses
3 large eggs
Topping
1 1/2 cups sour cream
1/3 cup sugar
2 teaspoons vanilla extract
For a 9 inch springform pan.
Crust:
In a food processor, add cookies, chopped chocolate, brown sugar, and nutmeg. Grind until all is broken up.
Add butter and proces until it clumbes together. Make sure to get all around the bowl.
Transfer crumbs to a 9-inch springform pan. Wrap hands in saran wrap to keep it from sticking. Use all of the crumbs, making a bottom layer, and patting it up the walls of the pan, leaving about 1-1 1/2 inches from top.
Ganache:
In a large saucepan, bring cream to a simmer. Remove from heat and add chocolate. Whisk until all is melted and smooth. Pour two cups over the crust and freeze until it is firm.
I cleaned up here and washed everything. By the time I was finished with this and the next step, it was ready. Keep the rest of the ganache covered at room temperature for decorating purposes later.
Bring cream to simmer in large saucepan. Remove from heat; add chocolate and Kahlúa. Whisk until chocolate is melted and ganache is smooth. Pour 2 cups ganache over bottom of crust. Freeze until ganache layer is firm, about 30 minutes. Reserve remaining ganache; cover and let stand at room temperature to use later for decorating.
Filling:
Place rack in middle of oven and preheat to 350. Mix cream cheese and sugar with an electric mixer. If you need to soften the cream cheese, do so. Make sure sugar isnt hiding anywhere in your bowl too!!!
In a seperate bowl, stir in rum, ground coffee, vanilla, and molasses. Truth be told, I forgot this step! I had tiny bits of coffee in my cake, but you couldnt taste them really. I still advise doing this step. It make it look nicer too. Mix together until coffee dissolves, then add to the cream cheese mixture. Beat in 1 egg at a time.
This is what mine looked like.
Grainy. So mix that coffee up!
Take your pan out of the freezer and pour mixture right ontop.
It’ll be very full, but its okay! Put a water bath in the oven to keep it from cracking. Also, do not open the oven for the first 30 mins. You want all the moisture to stay put! Place cheesecake on a rimmed baking sheet in the oven and bake for one hour. Once finished, transfer to a cooling rack for 15 mins, meanwhile prepare the toping. Don’t turn down the oven either.
Topping:
Whisk sour cream, sugar, and vanilla in medium bowl. Pour topping over hot cheesecake, making sure to over it entirely.
Bake until topping is set, about 10 to 15 minutes. Transfer cheesecake to rack and refrigerate hot cheesecake on rack until cool, about three hours.
Remove from fridge and run small sharp knife between pan and crust to losen it. Release pan sides and put on platter to be served on. Fill a pastry bag with a tip, star or plain, and pipe the design above, which is diagonls first, then stars around the edge. Chill for 6 hours before serving and set out for 15 before cutting. If you have espresso beans, place them on the intersections of each line. I sure wish I had some!
This cake is best eaten a day or so after it is made, so prepare it ahead of all other desserts and get it out of the way! It truly is delicious!
The Whoville cake.. as Angela calls it!
December 3, 2009
The WHOVILLE cake!
It’s even tie dyed on the inside!
I really wanted to try my luck with a tiered cake. It wasn’t all good, but it was mostly better than bad. I absolutely need some practice. But I really loved how my fondant turned out. I always add flavoring. =)
I don’t have too many pictures of the process, so I’ll try to just tell you a little bit of what I did.
I used any white cake mix. To get the cake to look like THIS on the inside, I divided the batter into 6 bowls, since I wanted to use 6 colors. I layered as you can see in the picture.
After I baked it and cooled it, I leveled it with my new nifty cake leveler that I bought on Black Friday for a mere 3 bucks. That was a nice price to me anyways.
After it was all level, I went ahead and colored my fondant. I went ahead and did the same method with sectioning it into 6 pieces to color it. Then I iced it in butter cream and rolled out my fondant. To get the tie dye look, I rolled them out like worms, then twisted them together, then kneaded it into a ball and rolled out to put on the cake.
And viola! Whoville cake!



![122509_1059[00]](https://harinayfe.files.wordpress.com/2009/12/122509_105900.jpg?w=300&h=225)


