In my opinion, the best so far!
December 26, 2009
First of all… sorry for the delayed post! I came home for Christmas break, and my computer’s charger has been shot. No worries now, its up and running!
Let me show you just a glimpse of what my Christmas gifts look like
This is just a portion of the baking stuff I received too!!! Maybe I should have shown you the depth of the bucket too…
Christmas is so full of baking! I made a couple of things, but I especially wanted to blog this one.
Look at this! It’s a cappuccino fudge cheesecake!I found it awhile back on Smitten Kitchen and immediately bookmarked it. I changed a couple of things from what she did, so my list below will be what I did, not SK. Mostly what I changed are things I did not have.
Oo-La-La. This is probably my prettiest cake to date. I love it. its very rich and filling. With al the calorie intake, it serves 32 people! That is insane!
Cappuccino fudge cheesecake
Crust
1/ box of oreo cookie, or 9 oz of any chocolate sandwhich cookies.
6 ounces bittersweet or semisweet chocolate, coarsely chopped
1/2 cup dark brown sugar, packed
1/8 teaspoon ground nutmeg
7 tablespoons hot melted unsalted butter
Ganache
1 1/2 cups heavy or whipping cream
20 ounces bittersweet or semisweet chocolate, chopped
Nearly 1/4 cup of cold coffee, then finish it off with a little bit of rum to the top. Dark or Light rum is fine.
Filling
3 8 ounce packages cream cheese, room temperature
1 cup sugar
1 1/2 tablespoons all purpose flour
1 1/2 tablespoons rum, dark or light
1 1/2 tablespoons instant coffee
2 teaspoons vanilla extract
1 1/2 teaspoons mild-flavored (light) molasses
3 large eggs
Topping
1 1/2 cups sour cream
1/3 cup sugar
2 teaspoons vanilla extract
For a 9 inch springform pan.
Crust:
In a food processor, add cookies, chopped chocolate, brown sugar, and nutmeg. Grind until all is broken up.
Add butter and proces until it clumbes together. Make sure to get all around the bowl.
Transfer crumbs to a 9-inch springform pan. Wrap hands in saran wrap to keep it from sticking. Use all of the crumbs, making a bottom layer, and patting it up the walls of the pan, leaving about 1-1 1/2 inches from top.
Ganache:
In a large saucepan, bring cream to a simmer. Remove from heat and add chocolate. Whisk until all is melted and smooth. Pour two cups over the crust and freeze until it is firm.
I cleaned up here and washed everything. By the time I was finished with this and the next step, it was ready. Keep the rest of the ganache covered at room temperature for decorating purposes later.
Bring cream to simmer in large saucepan. Remove from heat; add chocolate and Kahlúa. Whisk until chocolate is melted and ganache is smooth. Pour 2 cups ganache over bottom of crust. Freeze until ganache layer is firm, about 30 minutes. Reserve remaining ganache; cover and let stand at room temperature to use later for decorating.
Filling:
Place rack in middle of oven and preheat to 350. Mix cream cheese and sugar with an electric mixer. If you need to soften the cream cheese, do so. Make sure sugar isnt hiding anywhere in your bowl too!!!
In a seperate bowl, stir in rum, ground coffee, vanilla, and molasses. Truth be told, I forgot this step! I had tiny bits of coffee in my cake, but you couldnt taste them really. I still advise doing this step. It make it look nicer too. Mix together until coffee dissolves, then add to the cream cheese mixture. Beat in 1 egg at a time.
This is what mine looked like.
Grainy. So mix that coffee up!
Take your pan out of the freezer and pour mixture right ontop.
It’ll be very full, but its okay! Put a water bath in the oven to keep it from cracking. Also, do not open the oven for the first 30 mins. You want all the moisture to stay put! Place cheesecake on a rimmed baking sheet in the oven and bake for one hour. Once finished, transfer to a cooling rack for 15 mins, meanwhile prepare the toping. Don’t turn down the oven either.
Topping:
Whisk sour cream, sugar, and vanilla in medium bowl. Pour topping over hot cheesecake, making sure to over it entirely.
Bake until topping is set, about 10 to 15 minutes. Transfer cheesecake to rack and refrigerate hot cheesecake on rack until cool, about three hours.
Remove from fridge and run small sharp knife between pan and crust to losen it. Release pan sides and put on platter to be served on. Fill a pastry bag with a tip, star or plain, and pipe the design above, which is diagonls first, then stars around the edge. Chill for 6 hours before serving and set out for 15 before cutting. If you have espresso beans, place them on the intersections of each line. I sure wish I had some!
This cake is best eaten a day or so after it is made, so prepare it ahead of all other desserts and get it out of the way! It truly is delicious!
Pizza in the morning, Pizza in the evening…
December 13, 2009
A simple quick dinner fix is what I had in mind for tonight. This is my first non baked goods entry. I made two different “pepperoni breads”. We wanted one with meat, and one with out
“Tomato and Feta” & “Pepperoni with Habanero Cheese”
Here’s my cast of characters. You can add some additional toppings or spices too.
Ingredients
For Pepperoni Bread
Pepperoni
Pizza Crust
Habanero Cheese 4 oz.
Garlic Powder
Basil Leaves
Barley
Sea Salt
Pepper
1 Egg **for both pizza breads
For Tomato & Feta
Pizza Crust
Feta Cheese 4 oz.
Garlic Powder
Barley
Oregano
Sea
Directions
Pre-heat oven to 375
I really had to work with pizza dough. You know when you see all those commercials of the Italian pizza guys and they are throwing the dough into the air? Yeah, well there is a reason for that. At first I laid this out and tried rolling it out with a rolling pin. It was working at first, but it was like a big rubber band. It would snap back each time. The only way I found to make it work was to act like that pizza hut commercial where they sing “Hey Mambo! Mambo Italiano!” It was fun plopping it around and working my hands through it. I never got brave enough to actually throw it though. Maybe next time. I think pastry crusts would work better, but I couldn’t find it.Make sure you have a lightly floured surface.
After all said and done, I beat an egg and then brushed it liberally all over the dough. For the Pepperoni bread, I put the spices on first. I used garlic powder, basil leaves, oregano, sea salt, and pepper.
For the veggie bread, I put the tomatoes on first
Then I seasoned it. I really wish you could smell the aroma of garlic. I hope you like it. I concentrated on putting salt and garlic on the tomatoes. Those are what I wanted the flavor to take in on this one.
Now cheese. For pepperoni it was spicy cheese. Anything will do.
For veggie, it was feta.
Since my veggie is all done, I rolled it up, and pinched it together on the ends and the bottom to make sure it stayed together. I then placed it seam-side down on a greased cookie sheet.
Since I wanted meat on the pepperoni one, I added it all over. Add more or less. It all up to your taste buds!
Then cover it in a nice layer of cheese, about 4 oz
Followed the same directions and put them both on the greased cookie sheet and baked for 40 minutes, or until the crust looked nice and golden. Oh, I brushed them both again. But the tomato one with oil, the other with egg.
The Whoville cake.. as Angela calls it!
December 3, 2009
The WHOVILLE cake!
It’s even tie dyed on the inside!
I really wanted to try my luck with a tiered cake. It wasn’t all good, but it was mostly better than bad. I absolutely need some practice. But I really loved how my fondant turned out. I always add flavoring. =)
I don’t have too many pictures of the process, so I’ll try to just tell you a little bit of what I did.
I used any white cake mix. To get the cake to look like THIS on the inside, I divided the batter into 6 bowls, since I wanted to use 6 colors. I layered as you can see in the picture.
After I baked it and cooled it, I leveled it with my new nifty cake leveler that I bought on Black Friday for a mere 3 bucks. That was a nice price to me anyways.
After it was all level, I went ahead and colored my fondant. I went ahead and did the same method with sectioning it into 6 pieces to color it. Then I iced it in butter cream and rolled out my fondant. To get the tie dye look, I rolled them out like worms, then twisted them together, then kneaded it into a ball and rolled out to put on the cake.
And viola! Whoville cake!
Pumpkin patch treats
November 21, 2009
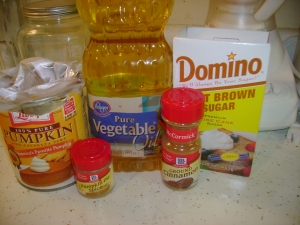
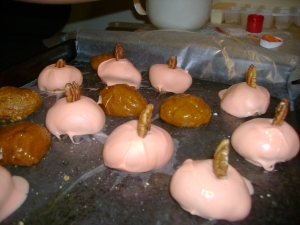
I needed a good pumpkin entry before thanksgiving at least! This is my pumpkin entry… Pumpkin truffles. Oh I love these. And I think everyone else does too.
Ingredients
1/4 cup butter
1/2 cup pumpkin puree
3/4 tsp pumpkin pie spice
1/4 tsp cinnamon
1/2 cup brown sugar
1/2 cup flour
1/2 tsp salt
White chocolate bark
Pecan halves
Orange food coloring
Directions
Mix butter, pumpkin pie puree & spice in a small non-stick sauce pan
Heat over med. heat for about 8-10 minutes. The mixture will lose its water and be about 1/2 cup
In a separate bowl mix brown sugar, flour, and salt well. Then add in cooked pumpkin and mix well.
Chill in freezer for 30- 1 hr. I like to do it as long as possible to make it easier to manage.
Roll into 1 inch balls and then into graham cracker and place on wax paper on a cookie sheet.
Place back into the freezer while you prepare the chocolate. Melt the chocolate in a deep bowl and then add orange food coloring to it. Make sure it is oil based since it is chocolate.
To dip into the chocolate, drop the round ball into the chocolate and then drizzle chocolate over it. Scoop out with a spoon and place on cookie sheet. While chocolate is still warm, place pecan on top to resemble stem.
I drew lines down the pumpkins with green food coloring. I hope you like it These will be a favorite!
Beat this Hershey’s cookies and cream!
November 17, 2009
Awhile back I found a High-Hat recipe on Martha Stewart. I looked into it and so many people said they had problems with it. Maybe it was beginner’s luck… but these maybe just one of my favorites. Again I made them for iteams. I just used Martha’s icing recipe and made my own cake mix. Here it goes!
Cookies & Cream cuppycakes
Ingredients
- 2 1/4 cups all-purpose flour
- 1 tbs baking powder
- 1/2 tsp salt
- 1 2/3 cups sugar
- 1 cup milk ( I always use almond milk. Dairy hates me!)
- 1/2 cup butter (1 stick)
- 2 tsp vanilla
- 3 egg whites
- 1 cup crushed Oreo type cookies (about 11 cookies, cream center included)
For the icing
- 1 3/4 cups sugar
- 3 large egg whites
- 1/4 teaspoon cream of tartar
- 1 teaspoon vanilla extract
For the chocolate coating
- 2 cups chopped (about 12 ounces) semisweet chocolate
- 3 tablespoons canola or vegetable oil
Directions
1. Pre-heat oven to 350. Line muffin tins with cupcake liners. I choose to do mini cupcakes. I liked it best this way.I had to make many of them and you will want to as well! They are definitely a favorite!
2. Mix flour, baking powder, salt, and sugar in bowl. Stir well.
3. Add milk, butter, and vanilla. Please be proud, I didn’t use an electric mixer! I just stirred and stirred and stirred!! I wanted to be quiet. =) Either way, just make sure you mix it super well, just until its moist.
4. Add egg whites and beat for 2 minutes.
5. Stir in 1 cup of crushed cookies.
6. Fill cupcake liners 2/3 full. For nearly anything I make, I don’t go by measurements too strictly. Just eyeball it, but when I fill cupcakes, I like to be precise… sooooo I used 1 TBS, making sure to clean out each scoop with my finger. Besides, at the end I get to lick my finger of all that uncooked goodness. I probably eat more of my treats before they are cooked than after!
7. Cook for 18 minutes. Cool in pan for 10 minutes, then remove to cool further.
Don’t these just look nice and puffy! We all ate quite a few of these cupcakes just like this. They too were perfect. You could just add vanilla frosting and then add some smashed up Oreos on top, but let’s take this a bit farther!
Directions for frosting
- In a large heatproof bowl, combine sugar, 1/4 cup water, egg whites, and cream of tartar. I had a small metal pan that I use as a double broiler. I defiantly spilled some over the side… But go to pick it back up since I forgot to add water and just scooped it out of the water it was in!
- Using a handheld electric mixer, beat on high speed until foamy, about 1 minute.
- Set bowl over a pan of barely simmering water. Beat on high speed until frosting forms stiff peaks, about 12 minutes; frosting should register 160 degrees.on a candy thermometer. Although it says 12 minutes, just do it until you notice it getting very firm. Remove from heat; stir in vanilla and beat for 2 minutes more until frosting thickens. I decide that it is finally done when I can pick up the mixer and act like I’m trying to make swirly tops and they stay in place. Sorry for the lack of photos here, but I really had to use all hands around me!
- Transfer frosting to a large pastry bag fitted with a plain medium sized frosting tip. Pipe rings on top of one another to form a stack.
You could stop here.. but who doesn’t love chocolate!? Okay.. not everyone does, but I sure do! Go ahead and place these on a cookie sheet in the fridge while you clean up and prepare your coating.
Don’t you think they look like Ghosts from Ghostbusters? Or Michelin tire man?
Directions for Coating
1. Combine chocolate and oil in a medium heat-proof bowl set over a medium saucepan of barely simmering water; stir until melted and smooth.

2. Transfer to a small bowl, and let cool about 15 minutes.
3. Holding each cupcake by its bottom, dip cupcake in the chocolate to coat frosting, allowing excess to drip off. Transfer to something for them to drip onto. I sat them on wax paper. Make sure all of the frosting is covered. Let cupcakes stand at room temperature for 15 minutes.


Place them in the fridge for at least two hours before serving!
Whats the best part about these? When you cut them down the middle!
TOMS Shoes.
November 12, 2009

I remember seeing the AT&T commercials for Toms Shoes. I didn’t really think it was a legit organization at first. Once I learned more about it, I realized that it is a great opportunity for people to help out in ways we never thought possible. If you aren’t familiar with Toms Shoes, visit his site and buy some super comfy shoes.
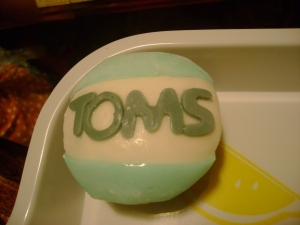
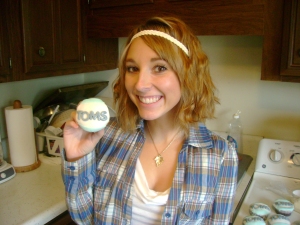
This is my first real experience with fondant. And honestly, I’m so happy, thrilled, ecstatic, you name it, with these cuppycakes. I chose the lazy way out and bought pre-made fondant, namely because I had a test to study for today. I wanted to bake something that I could take to BCM on wed. night.
My wonderful boyfriend surprised me at work one day with a cupcake book. I flipped through it and found a recipe I thought would yield fairly flat top cupcakes. I did get to taste these cupcakes since I cut off the tops of any that started to form a peak.
I started with the Mini Cocoa Cupcake recipe. Since it was meant for mini-cupcakes, it only made 12 cupcakes. Don’t worry, I made more than 12.
Ingredients
1 cup sugar
1 cup all-purpose flour
1/3 cup Cocoa
3/4 teaspoon baking power
3/4 teaspoon baking soda
1/2 teaspoon salt (I used sea salt. I love this stuff!)
1 egg
1/2 cup milk
1/4 cup vegetable oil
1 teaspoon vanilla extract
1/2 cup boiling water
Directions
Heat oven to 350. Either spray muffin cups with cooking spray or use paper liners.
Stir together sugar, flour, cocoa, baking power, baking soda, and salt in bowl.
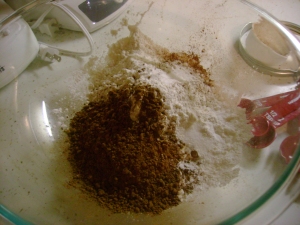
Add egg, milk, oil, and vanilla. Beat on medium speed for about two minutes.
Stir in boiling water. This will make the batter very thin. Make sure to stir it together very well.
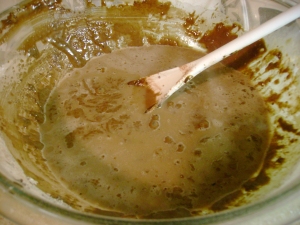
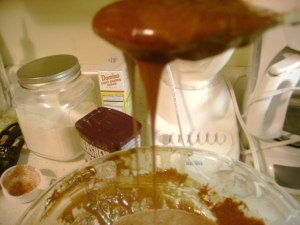
Fill muffin cups 2/3 full. Really try hard not to put that little bit extra in there to overfill it. It is tempting, I know.
I used a 1/3 cup scooper to fill it, but I didn’t make sure the scooper was all the way each time.
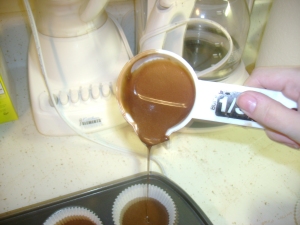
Bake for around 10-12 minutes or until a toothpick comes out clean. Let cool in pan for about 10 minutes then set out on wire rack to cool.
Make sure the tops of each are nice and flat. If they aren’t, just slice it off slightly and feel free to eat the scraps! Yum! I sure did.
Once the cupcakes are absolutely completely cooled, ice them with buttercream icing. Do this buy dipping the
tops of them. Let the excess drip off back into the icing mix.
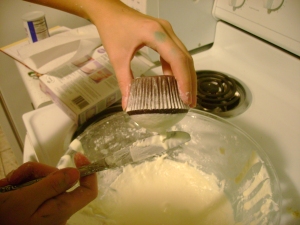
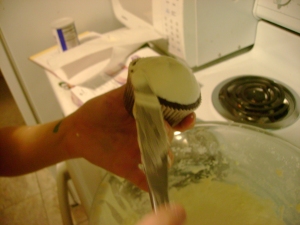
Now is time for the fondant. So much patience comes with these steps. While the cupcakes were baking, I took the time to dye and flavor the fondant. For me, fondant is rather bland, so I like to add some plain flavoring to it. Since I needed three colors for these cupcakes, I divided the pre-made fondant into three sections for about how much I felt I would need for each section. To die and flavor, I took a toothpick, dipped either in vanilla extract or food coloring, and kneaded it into it and kept adding color until I got the color I was aiming for. Usually it’s best to buy fondant that is already dyed black. So I tried to use the littlest amount of black as I could. For true black, it’ll take a whole bottle of food coloring and then will leave it tasting funny. Make sure to add plenty of confectioner’s sugar to your work surface and keep picking up the fondant so it doesn’t stick.
Whew! Now moving on…
I started with the white covering. I took a large round cookie cutter and cut out circles to fit around the cupcakes, smoothing it around the edges to be even with the edges. After doing every single one of these little cupcakes.
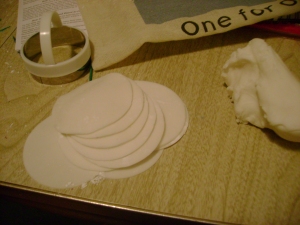
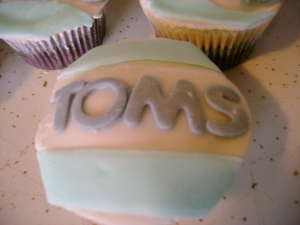
Then I made these nice trident looking strips. To attach these I brushed the back of them with water, either with your finger, or with a paint brush. Then press it onto the top and bottom of each cupcake.
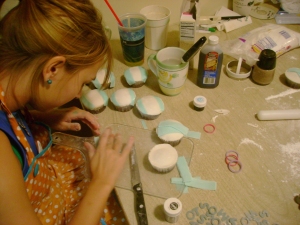
Next come these itty bitty letters. Let’s see. TOMS.. that’s four letters. 4×26= 92. 92 letters that is. Whew.
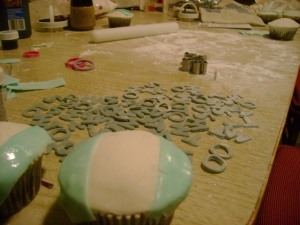
This isn’t even half of the letters… more pressing and cutting.
I just did the same with these letters. Add water. Usually with these I dipped them into the water to get all the powered sugar off of them.
And Viola! Fondant TOMS shoes cupcakes. I hope everyone at BCM thoroughly enjoyed them!
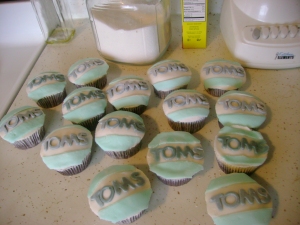
This ain’t no monkey business
October 31, 2009
Happy Halloween!!
I’ve really been lacking in seasonal desserts on here. Maybe my November will be more festive filled. After I finished this recipe, I thought of a new way to make it seasonal. I’ll include that in this post as well.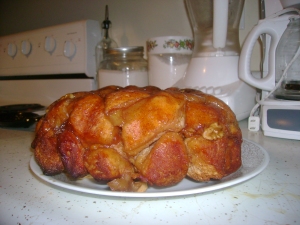
There is something about this delicious bread that makes people go… well bananas! Maybe that’s why it’s called monkey bread. That must be it.
This recipe is nearly fool-proof. Really. Use too little or too much, it all turns out okay. It’s so simple. I changed it up a little bit. Here is what I did.
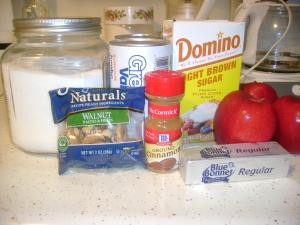
Ingredients:
- 1/2 cup sugar
- 1 tsp. cinnamon (heaping)
- 2 cans of large biscuits
- 1/2 cup walnuts
- 1 cup brown sugar (firmly packed)
- 3/4 cup butter
And then I also added these items which are optional
- 2-3 apples (or any type of dried fruit you like use about the same amount of walnuts)
- 1 tsp. nutmeg
You will also need a fluted/bundt pan
Directions:
- Pre-heat oven to 350
- Lightly grease the pan and set aside
- In a bag or a sealable bowl mix sugar (not brown), cinnamon, and nutmeg
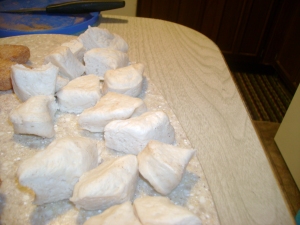
- Separate dough and cut into quarters.
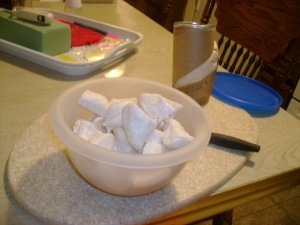
- Place into the sugar mix and coat thoroughly. You may have to do this in increments. I like to give it a nice tossing action. =) Pull them out and set aside.
- Peel the apples and cut them up. Each time I have done this I also have sugar mixture left over. So I thought, why not? I may as well add the apples to the mix. So i tossed the apples in them too!! Extra cinnamon taste!
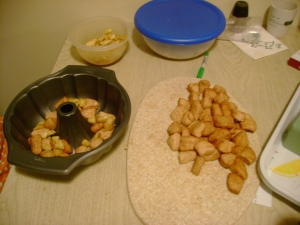
- Arrange the dough pieces in the pan in one layer, then adding nuts and apples. Continue this step until you run out of dough.
- Melt butter and then add the brown sugar.
- Now pour over the biscuit dough. In the oven it’ll melt all though the biscuits and make it super moist and tasty of course!!
- Bake 28-32 minutes or until top its lightly golden.
- Let cool in pan for 10 minutes.
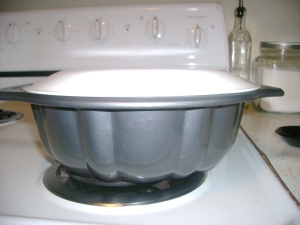
- Find the plate you want to serve this on and turn the pan upside onto it to serve it.
This is always best served warm!
If you are hopping around and yelling like an ape, don’t blame me! It’s the bread!!
But for the seasonal aspect of this, why not add pumpkin into it? how can we do that? Well… you can salt some pumpkin seeds and add them instead of walnuts. Oh yum! Maybe take out the apples too. But that’s no it. I’d take 1/2 cup or so of pumpkin puree and add it to the butter mix and pour that over top instead. Oh I will have to try that! I probably won’t post it, but I’ll let you know if it’s any good!
Fall reminds me of… Candy Apples!
October 29, 2009
The leaves are changing.. the smell of apple cider is filling the air and hot drinks are the beverage of choice. So of course I had to make candy apples. Oh it is one of my favorite sweets truth be told. There is something delicious about caramel dripping all over your hands while the nut topping is falling onto the floor. My iteam is celebrating an engagement and a birthday! But shhh.. it’s a secret! Here is my treat that I brought to iteams.
What else would I want to make other than Candy Apples!!?
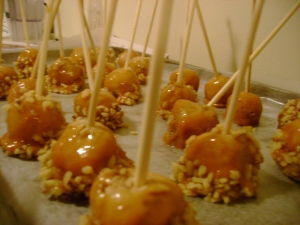
Don’t these look delicious?
But wait… aren’t they a little small to be apples? Maybe they are candy apple bites…
No…they must be cake pops!! I promised a cake pop entry and here it is. I really wanted a “fallish” cake pop. I love cake pops since they are so fun to decorate. The ideas are endless really.
So here is what I did…
Yields: around 40 some cake pops.
Ingredients:
- A vanilla based cake. White cake is good too but I chose buttery yellow cake and all the ingredients needed for that
- Cream cheese frosting
- Kebab skewers (I preferred these skewers instead of candy sticks to make them look more like apples)
- Cinnamon and if I had it, I would have used nutmeg too
- 2-3 apples
- 2 bags of caramel candy melts
- Any toppings you want to add. I use nut topping to make it more candy apple-esq.
Directions:
- First preheat the oven to 350.
- Make the cake as directed on the box.
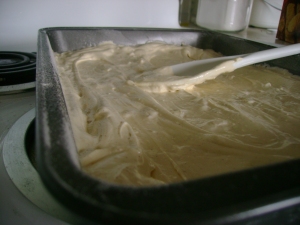
- Make the cake as directed on the box.
- Peel the apples and chop them into small pieces.
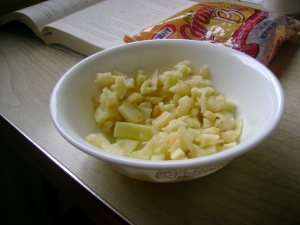
- Next add the apples and cinnamon. I just added cinnamon to my liking. I sprinkled it unt il the top layer was nearly covered!!
- After the cake has finally cooled, crumble it in a large bowl into a fine consistency.
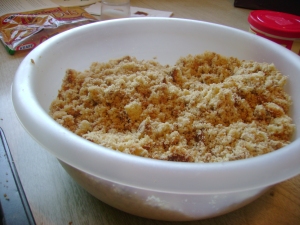
- Add nearly a full container of the frosting.
- Mix well. I use my hands mak ing a squishing motion. =)
- Line a cookie sheet with wax paper and roll the cake into small 1-1 1/2 inch balls and place on the cookie sheet.
- Place in the freezer for around 30 minutes. I like to keep them in their for a long time so they are niiiice and firm!
- Take a breather here. If you are a college student like me, go study while they harden up!
- I really like a double boiler method for melting. Of course my double boiler is rather…simple. Just a pan of water with a metal pan on top. Add the caramels and 4 tbs. of water
- Make sure you are constantly stirring these caramels.
- Pour the nut topping out into a bowl.
- Grab another cookie sheet and place new wax paper on it and spray with cooking spray.
- Take the cake pops out of the freezer and stick a wooden skewer down into the center of them.
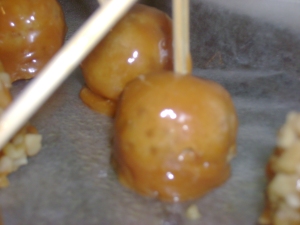
- Dip them into the caramel and tap them on the edge of the bowl to let some of the caramel drip off.
- Quickly dip it into the bowl of nuts. I tapped the nuts onto the cake pops to make the stick on the sides.
- Place back onto the wax paper and let sit.
There you have it! Instead of candy apples… its apple flavored cake pops!
Whew.. looking back that looks like a lot of directions. It’s not really. Just a really detailed version since I’ve never done just a cake pop entry. Maybe a simple cake pop entry will be next!
p.s Sorry for such bad quality in pictures! It’ll be better next time.
Lizz
Birthday Cupcake Cones Oh my!
October 20, 2009
I have to admit. I’ve made quite a few recipes but have really lacked in actually posting them.
Some were…
- Halloween Cake pops
- Birthday Cake pops
- Smores Truffles
- Toasted Pecans
- Meringue Cookies
- Kettle Korn
But as I write this, i had a new idea for a new truffle. I think I’ll do that tonight. That is after I climb and do work. Oh college.
Did I mention Morgan’s birthday was last week? Her only request was funfetti cake. So of course we made funfetti cake.. but we made it fun!

Birthday Ice Cream Cones!
But why aren’t they melting? It’s ice cream right? Nope! Funfetti Cupcake Cones!!
Now when I made these, I filled them up just a bit too full.
I suggest filling the cones up to the middle of the last ledge.
Ingredients
- Cake mix of any kind and the ingredients listed on the back of the box (oil, water, eggs)
- Ice cream cones with flat bottoms
- Icing
- Any decorations you would want; sprinkles, food coloring, maybe even candles!
Pre-heat the oven to 350.
Mix the cake as directed on the box. I usually choose the fluffy version of cakes. Actually.. I always do!
I made 24 Cupcake Cones. There are different methods of how to support the cones, but I prefer the cupcake pan one best. I use the mini cupcake pans and place the ice cream cones in each hold.

Usually about one spoonful fills the cones up enough. I fill it to the middle of the last ledge. Any more and it will overflow in the oven and cause the cone to become mushy on the outside. I really like baking the cake in the cones, that way you can eat the whole cone! YUM! You can always put candies in the bottom of the cones if you’d like. M&Ms, Reese Pieces.. the ideas are limitless!
Once you are placing the cupcake cone filled tin back in the oven, make sure to not let them spill over. They are stable, but not too stable. A nice elbow bump could really mess this up!
Bake in the oven for about 22 minutes or until a toothpick comes out clean. Toothpicks are a little short. So I used kebab skewers.
Let the cakes cool completely before icing and decorating them!
Enjoy birthday cupcake cones!
Bienvenido A Harina y Fe
October 8, 2009
 Can’t read that? That’s okay. More than likely it’ll all be in English anyways. I just get too excited sometimes and spat out Spanish. It’s a love of mine, just as baking and cooking are. Harina y fe stands for Flour and Faith. Baking really is something you have to put faith into. Not everything comes out right the first time, or second time, or the fourth time, because the third time was right; like kettle korn (I prefer the alliteration use of the k’s) This blog will be more of a memory book for me to keep recipes, stories, and thoughts. Hopefully this site will help and inspire you to become creative in the kitchen. Thanks for reading. Keep a close watch for a Cake pop entry!
Lizz


![122509_1059[00]](https://harinayfe.files.wordpress.com/2009/12/122509_105900.jpg?w=300&h=225)


